banner3
previous arrowprevious arrow
next arrownext arrow
High-precision instruments
0
Factory area
0
skilled workers
0
partners
0

Leedsen-Your trustworthy optical lens manufacturers in china​

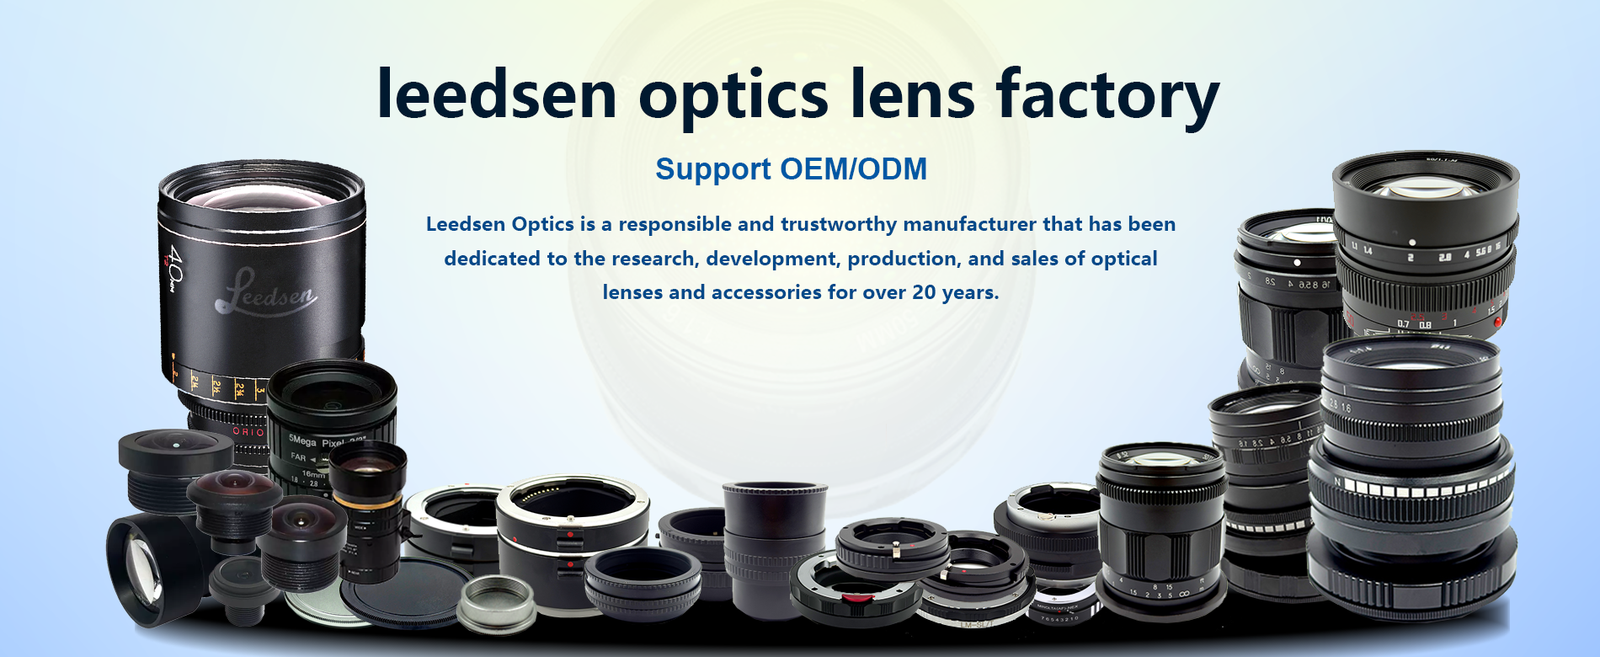
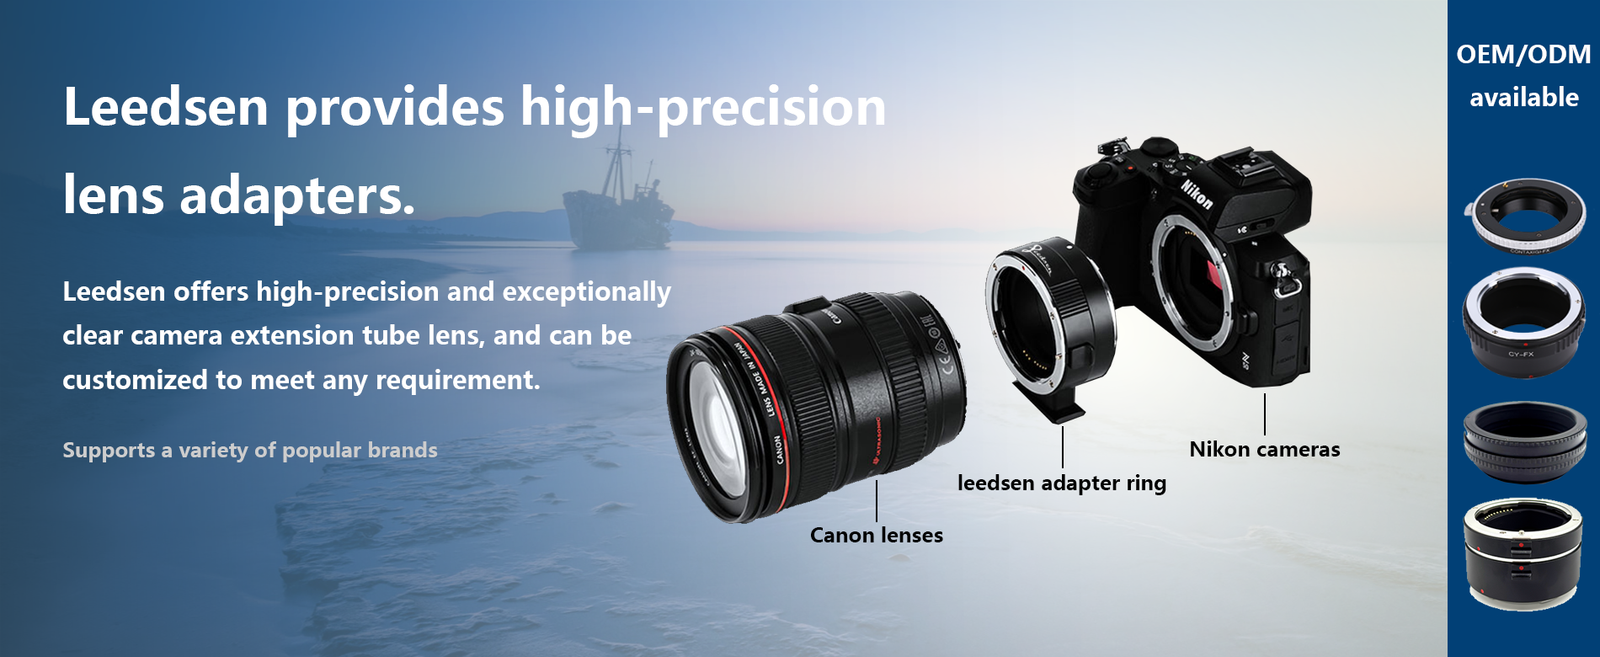
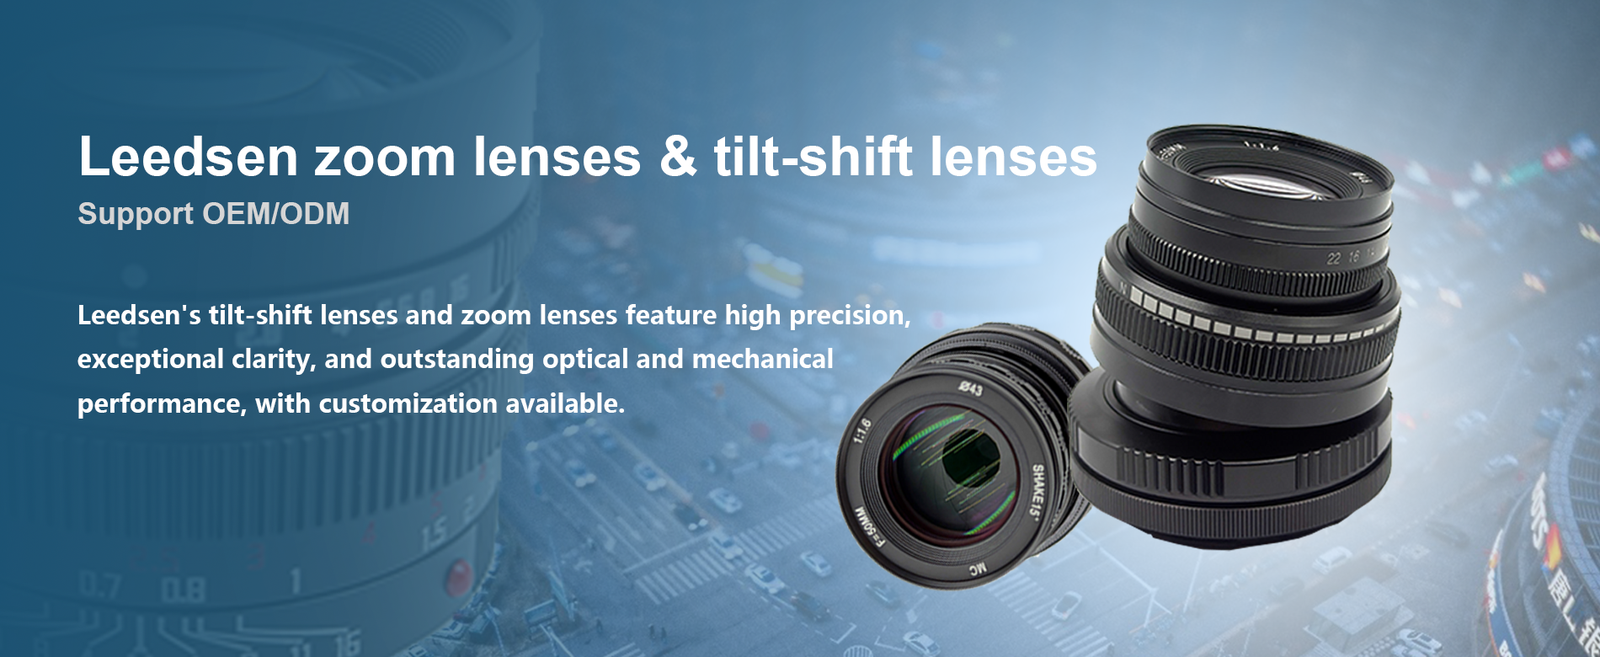
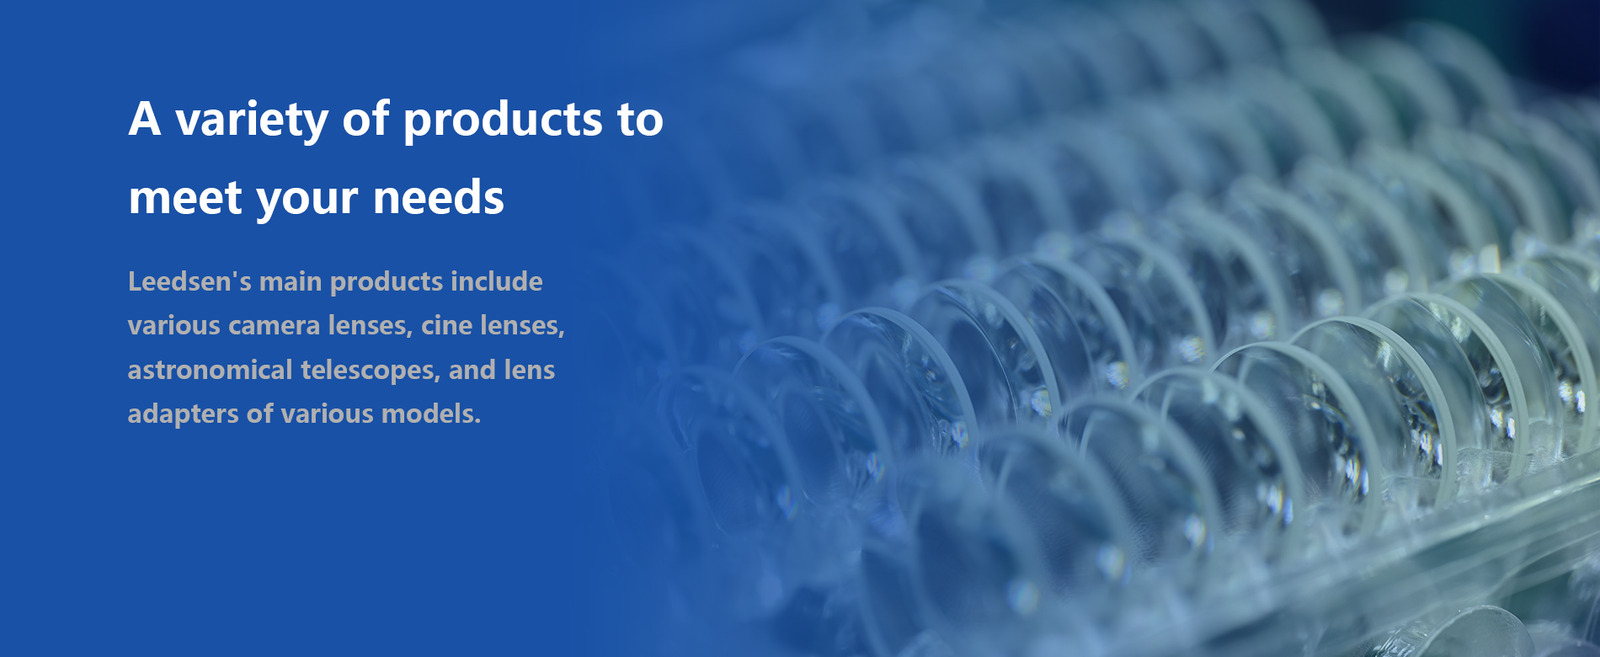
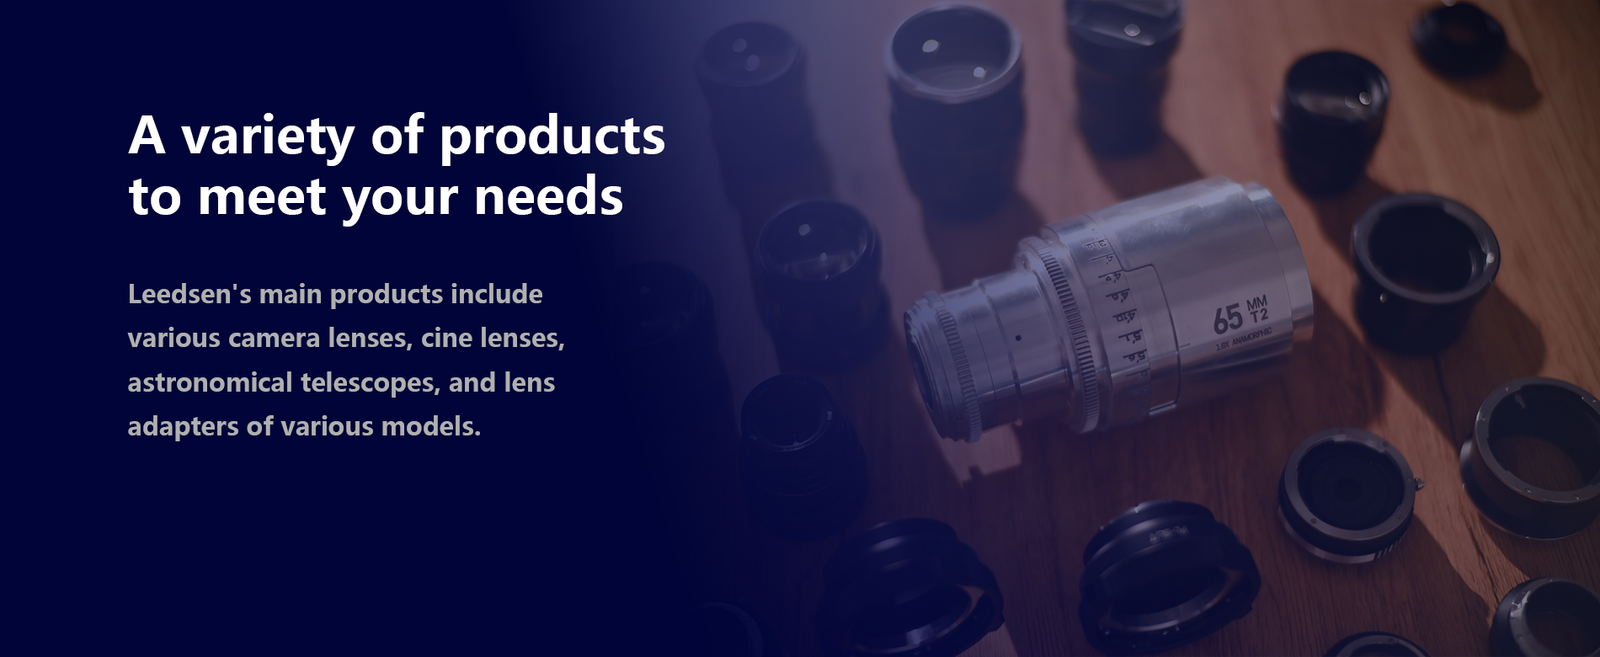
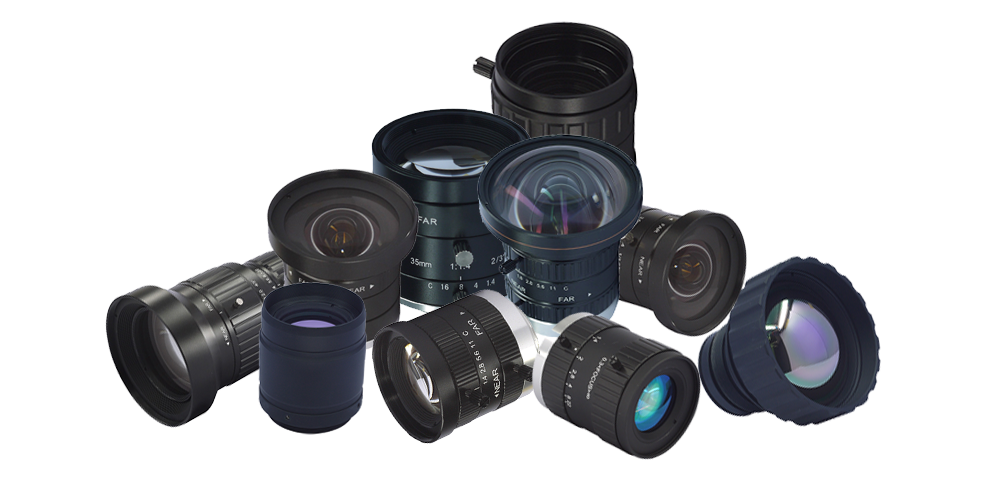
Guangdong Leedsen Optical Products Co., Ltd. specializes in producing camera accessories, camera lens, lens mount adapter ring, filters CPL.NDX, UV copper rings, focusing helicoid adapter and so on. And can provide customers with plans to take samples or do OEM. Our company was established in September 2004, which has an area of 7000 square meters. We have imported approximately 80 sets of CNC lathes, machining centers, and small auxiliary equipment from Japan, which have enabled us to form a complete industrial chain covering turning, milling, drilling, tapping, surface treatment, laser engraving, assembly, packaging, and shipping. Our integrity, strength, and product quality are recognized within the industry.

Our products

Products are the core business of a company. Leedsen's products are widely used in optics, medical, industrial, diving, aerospace and other fields. Main products include camera lenses, lenses, lens adapters, electronic lenses, cine lenses, astronomical telescopes, and custom high-precision hardware.

camera lens

It incorporates cutting-edge optical technology to provide high-resolution, low-dispersion professional photography and cinema lenses to meet the needs of ultra-high-definition shooting.

Lens adapter ring
Telescopes and astronomical telescopes
Digital and electronic lenses
Customized non-standard hardware products

Why choose us?

With over 20 years of dedicated service in the field of camera lens manufacturer​, Leedsen Optics has accumulated a wealth of experience and expertise. Consistently providing high-quality lenses and accessories with exceptional service, Leedsen Optics is your preferred supplier of lenses and related accessories.

1.Professional R&D team

Leedsen Optics boasts a professional R&D team with over ten years of experience in optical engineering, covering design, production, and quality control. They are highly skilled at understanding the diverse requirements of their clients' projects..

Stringent quality requirements

Leedsen's robust quality control team conducts multiple rigorous quality control processes on the optical and mechanical performance of each product.

fully equipped factory

The Leedsen Optics factory covers an area of ​​7,000 square meters and has 4 manual assembly lines and 70 professional production machines, which can meet the needs of customers for large-volume production.

Hundreds of Lens Models

4.Leedsen has developed over 300 optical lenses applicable to various brands of cameras, drones, and automobiles. Custom lenses are also supported.

Case Studies

Leedesen always treats every customer's product with the utmost rigor. Whether you are a newly established personal studio or a publicly listed company, you are a client of Leedsen.

Our Partners

Leedsen camera lens manufacturer is committed to providing customers with high-quality, low-priced products.

Blog

Acquire relevant professional knowledge

In the simplest terms, a camera body is merely a light-proof box containing a recording medium, be it a digital sensor or a strip of film. While the camera body records the image, it is the lens that actually creates it. When asking what does a camera lens do, one is essentially asking how a device captures a three-dimensional scene and translates it onto a two-dimensional plane. The lens is not just a passive window; it is an active manipulator of physics. It gathers light rays, bends them through a series of glass elements, and focuses them into a coherent image with specific characteristics of sharpness, contrast, and depth. To understand photography, one must understand the lens. It determines the field of view, the magnification, the amount of light entering the system, and the aesthetic quality of the background blur. This guide explores the mechanical and optical engineering behind how camera lenses function. The Fundamental Physics: Refraction and Convergence At its core, the function of a camera lens relies on the physics of refraction. Light travels in straight lines. However, when light passes from one medium to another of a different density (for example, from air into glass), it changes speed and bends. If a piece of glass is curved properly, it can bend parallel light rays so that they converge at a single point. This is the basic principle of a convex lens. What does a camera lens do with these light rays? Gathering: It captures a cone of light from the scene. Bending: It refracts those rays inward. Focusing: It directs the rays to meet at a specific distance behind the lens, known as the focal plane. When the focal plane aligns perfectly with the surface of the camera’s image sensor, the image is “in focus.” If the rays meet before or after the sensor, the image appears blurry. The complexity arises because light of different colors bends at different angles, and flat sensors require a flat field of focus, necessitating complex engineering beyond a simple magnifying glass. Anatomy of a Lens: More Than Just Glass A modern camera lens is a tube packed with precision engineering. It is rarely a single piece of glass. Instead, it is an optical assembly consisting of multiple elements arranged into groups. 1. Optical Elements These are the individual glass lenses within the barrel. Some are convex (curving outward) to converge light, while others are concave (curving inward) to diverge light. Correction: By combining different shapes and types of glass (with different refractive indices), engineers correct for optical errors called aberrations. Coatings: Elements are treated with microscopic chemical layers to reduce reflections and prevent “flare” or “ghosting” when shooting into bright light. 2. The Aperture Mechanism (The Diaphragm) Inside the lens barrel sits a mechanical iris made of overlapping blades, known as the aperture diaphragm. This mechanism controls the diameter of the opening through which light passes. Light Volume: Expanding the iris (e.g., f/1.8) allows more light in, essential for low-light environments. Depth of Field: This is a critical artistic function. A wide aperture creates a shallow depth of field, isolating the subject by blurring the background. A narrow aperture (e.g., f/16) keeps everything from the foreground to the horizon sharp. 3. Focus and Zoom Mechanics Lenses move. To change focus from a mountain in the distance to a flower inches away, the internal glass elements must move forward or backward to shift the focal point. This is driven by the focus ring or an internal autofocus motor (such as ultrasonic or stepping motors).In zoom lenses, separate groups of elements move independently to change the magnification (focal length) while keeping the image in focus. The Concept of Focal Length: Angle of View When discussing what does a camera lens do, focal length is the most defining characteristic. Measured in millimeters (e.g., 24mm, 50mm, 200mm), it technically describes the distance between the optical center of the lens and the sensor when focused at infinity. Practically, however, it dictates the Angle of View and Magnification: Wide Angle (e.g., 14mm – 35mm): These lenses have a short focal length. They “push” the scene away, capturing a broad field of view. They exaggerate the distance between foreground and background objects, making spaces feel larger. Standard/Normal (e.g., 50mm): These approximate the field of view and perspective of the human eye (excluding peripheral vision). Images look natural and undistorted. Telephoto (e.g., 85mm – 600mm+): These have a long focal length. They act like telescopes, magnifying distant subjects. Optically, they compress the scene, making background elements appear larger and closer to the subject than they really are. Optical Corrections: Fighting the Laws of Physics If a lens were a single piece of simple glass, the resulting image would be flawed. Light is messy. A major part of what a camera lens does is correcting for natural optical phenomena that degrade image quality. Chromatic Aberration Light acts like a prism; different colors (wavelengths) bend at slightly different angles. Blue light bends more sharply than red light. Without correction, these colors would not hit the sensor at the exact same spot, resulting in purple or green color fringing around high-contrast edges. Lenses use “Low Dispersion” (ED/LD) glass elements to force these wavelengths to align. Distortion Barrel Distortion: Common in wide-angle lenses, where straight lines near the edge of the frame appear to bow outward. Pincushion Distortion: Common in telephoto lenses, where lines bow inward.Complex aspherical lens elements (elements that are not perfectly spherical) are ground to specific shapes to counteract these distortions and keep lines straight. Vignetting Lenses naturally project a circle of light. The corners of this circle are often dimmer than the center due to the physical length of the lens barrel blocking some peripheral light. Modern lens design attempts to minimize this “light fall-off” to ensure even exposure across the frame. Image Stabilization Modern lenses often perform an active role in counteracting human error. Inside the lens, a specific group of elements is suspended floating in a magnetic field. Gyroscopic sensors detect the tiny movements of the photographer’s hands. The lens then physically shifts that floating element in the opposite direction of the shake. This real-time compensation keeps the image steady on the sensor, allowing photographers to shoot at slower shutter speeds without motion blur. This is distinct from the camera body; it is the lens itself physically moving the light path. Prime vs. Zoom: The Functional Trade-off The market is divided into two main categories, each performing the job of light transmission differently. Prime Lenses:These have a fixed focal length (e.g., a 35mm lens). Because they do not need the complex moving parts required to zoom, they are optimized for one specific task. Performance: Generally sharper and lighter. Speed: They can open to wider apertures (f/1.4 or f/1.2), letting in massive amounts of light. Zoom Lenses:These have a variable focal length (e.g., 24-70mm). Versatility: They allow the photographer to crop and frame the scene without moving their feet. Complexity: They require far more glass elements to maintain focus and image quality across the zoom range, which can result in a heavier, darker (smaller aperture) lens. The Aesthetic Role: Rendering and “Bokeh” Beyond technical sharpness, a lens is responsible for the “character” of an image. This is often subjective but highly valued. One of the most discussed aspects is Bokeh (derived from the Japanese word for “blur”). This refers to the aesthetic quality of the out-of-focus areas. What does a camera lens do to affect this? The shape of the aperture blades determines the shape of the bokeh balls. More blades (9 or 11) create circular highlights; fewer blades create polygons. The optical design determines if the blur is creamy and smooth or “nervous” and jagged. This rendering capability is why portrait photographers often prefer specific “portrait lenses” (like an 85mm) that are engineered specifically to render skin tones and background blur in a flattering way. Conclusion In summary, what does a camera lens do? It is a device of transformation. It takes the chaotic, multidirectional photons bouncing off objects in the real world and imposes order upon them. It utilizes the physics of refraction to converge light onto a focal plane. It utilizes a mechanical iris to control intensity and depth. It utilizes exotic glass formulations to correct for color and distortion. And finally, it imparts a specific perspective—whether the wide expanse of a landscape or the intimate compression of a telephoto portrait—onto the scene. The camera body may be the brain that records the data, but the lens is the eye that interprets the world. Understanding its function is the key to mastering the transition from simply capturing a scene to creating a photograph. Frequently Asked Questions (FAQ) Q: Does the lens affect image quality more than the camera body?A: Generally, yes. While the camera sensor determines resolution (megapixels) and low-light sensitivity (ISO), the lens determines contrast, color accuracy, sharpness, and the aesthetic quality of the background. A high-quality lens on a cheap camera will usually produce a better image than a cheap lens on a professional camera. Q: What do the numbers on a camera lens mean?A: The two most important numbers are the Focal Length (e.g., 50mm, 18-55mm), which determines zoom and angle of view, and the Maximum Aperture (e.g., f/1.8, f/3.5-5.6), which indicates how much light the lens can let in. Smaller f-numbers mean a wider opening and better low-light performance. Q: Why are some camera lenses so expensive?A: The cost is driven by the quality of the materials and the engineering. Expensive lenses use high-grade optical glass (fluorite, extra-low dispersion) to eliminate aberrations. They also feature weather-sealing, faster autofocus motors, and wider maximum apertures (which require much larger, heavier glass elements). Q: Can any lens fit on any camera?A: No. Lenses are designed with specific “mounts” (e.g., Canon RF, Sony E, Nikon Z). The lens mount must match the camera body. While adapters exist to mix systems, native lenses generally offer the best autofocus and stabilization performance. Q: What is the difference between optical zoom and digital zoom?A: Optical zoom is performed by the lens; glass elements move to magnify the image, preserving full resolution and quality. Digital zoom is performed by the camera software; it simply crops into the center of the image and enlarges the pixels, which significantly degrades image quality.   [...]
In the digital age of photography, where software like Adobe Lightroom and Photoshop can manipulate colors, exposure, and contrast with a few clicks, a common question arises among enthusiasts and professionals alike: what do camera lens filters do, and are they still necessary? While it is true that many effects can now be simulated digitally, lens filters remain a critical component of the photographic toolkit. They are not merely accessories; they are optical modifiers that alter the properties of light before it strikes the camera sensor. A camera lens filter is a piece of glass (or resin) placed in front of the lens element. Its primary function is to block, redirect, or modify specific wavelengths or intensities of light. Understanding what do camera lens filters do requires breaking down their functions into three primary categories: physical protection, light management, and optical correction that software cannot mimic. This guide provides a technical and practical breakdown of the most essential filters, explaining the physics behind them and why they remain indispensable for high-quality imaging. The Foundation: Protection vs. Image Quality The most basic answer to what do camera lens filters do is “protection.” However, this is a subject of debate within the optical community. High-end camera lenses feature complex, multi-layered coatings designed to maximize light transmission and minimize flare. The front element is exposed to the elements—dust, rain, salt spray, and accidental impact. UV Filters (Ultraviolet) and Clear Filters Historically, in the era of film photography, film stock was highly sensitive to ultraviolet light. High altitudes or coastal scenes often resulted in images with a hazy, blue cast. Photographers used UV filters to block these non-visible wavelengths to improve clarity. Digital sensors, however, are inherently less sensitive to UV light, and modern digital cameras have UV-blocking filters built directly over the sensor stack. Therefore, on a modern digital camera, a UV filter does not significantly alter the image quality. Instead, its role has shifted entirely to physical protection. Sacrificial Layer: If a camera is dropped lens-first, the filter shatters instead of the $2,000 front element. Environmental Shield: It seals the front of the lens against sticky pollen, salt water, and abrasive sand. It is much safer to clean a $50 filter than to scrub the coatings of a precision-engineered lens. The trade-off is optical. Adding cheap glass in front of a lens can introduce “ghosting” (secondary reflections) and reduce contrast. Therefore, if using a filter for protection, high-transmission, multi-coated glass is essential to maintain the lens’s native resolving power. Light Management: The Neutral Density (ND) Filter If UV filters are the lens’s “safety goggles,” Neutral Density (ND) filters are its “sunglasses.” To understand what do camera lens filters do in the context of exposure, one must look at the exposure triangle. Sometimes, there is simply too much light entering the camera to achieve the desired creative effect. An ND filter blocks light across the entire visible spectrum equally (hence “neutral”). It does not alter the color of the light; it simply reduces the intensity. This reduction is measured in “stops.” A 3-stop ND filter, for example, allows only 1/8th of the ambient light to pass through. Why Reduce Light? There are two primary technical reasons to reduce light intake: Long Exposure Photography:In bright daylight, a camera’s shutter speed might be 1/1000th of a second. This freezes motion. To capture the silky, flowing look of a waterfall or the motion blur of clouds, the shutter must stay open for seconds or even minutes. Without an ND filter, a long exposure in daylight would result in a completely white, overexposed image. The ND filter restricts the light, allowing the shutter to remain open longer without overexposing the scene. Depth of Field Control:Cinematographers and portrait photographers often desire a “shallow depth of field” (blurred background), which requires a wide aperture (e.g., f/1.4 or f/2.8). On a bright sunny day, opening the aperture this wide lets in too much light, even at the fastest shutter speed. An ND filter cuts the light down, allowing the use of wide apertures in bright conditions to achieve that cinematic background blur. Variable ND vs. Fixed ND Fixed ND: Reduces light by a specific amount (e.g., ND8, ND64, ND1000). These offer the highest optical quality. Variable ND (VND): Consists of two polarizing layers that rotate against each other. By turning the ring, the user can adjust the density (e.g., from 2 stops to 8 stops). While convenient for video, they can suffer from the “X-pattern” cross-polarization artifact at maximum density. Optical Correction: The Circular Polarizer (CPL) When asking what do camera lens filters do that Photoshop absolutely cannot do, the answer is usually the Circular Polarizer (CPL). This is arguably the most powerful filter for landscape and product photography. Light from the sun is unpolarized, meaning the light waves vibrate in all directions. When light hits a non-metallic surface—like water, glass, leaves, or even moisture in the sky—it bounces off and becomes “polarized,” vibrating in a specific plane. This reflected polarized light creates glare. A CPL filter contains a microscopic grid that blocks light waves vibrating in a specific direction. By rotating the front element of the filter, the photographer can selectively block this polarized reflected light. The CPL Effect Removing Glare from Water: A CPL allows the camera to see through the surface of a lake or river to the rocks below, rather than seeing a white reflection of the sky. Saturating Foliage: Leaves have a waxy coating that reflects the white sky, making forests look washed out. A CPL cuts this glare, restoring the deep, natural green of the vegetation. Darkening Blue Skies: By blocking polarized light scattered by atmospheric particles, a CPL renders blue skies deeper and more dramatic, increasing the contrast against white clouds. Crucially, this effect cannot be replicated in post-processing. Once the glare is recorded by the sensor, the detail underneath that glare is lost forever. Software cannot “see through” a white reflection that was baked into the raw file. Creative Diffusion: Mist and Special Effects While the industry pursues sharpness, a counter-movement involves “softening” the image. Mist or Pro-Mist Filters:These filters contain tiny specs of black or white particulate within the glass. What do camera lens filters do in this category? They diffract light sources. When a bright light (like a streetlamp or the sun) hits the filter, it creates a soft “haloing” or “blooming” effect. This reduces the digital sharpness that some filmmakers find “clinical,” giving the image a more organic, film-like atmosphere. They also slightly lower contrast, helping to smooth out skin tones in portraiture. The Digital Dilemma: Filters vs. Software A common skepticism involves the necessity of physical glass in the era of computational photography. Why buy a graduated neutral density (GND) filter to darken a bright sky when one can simply apply a gradient mask in Lightroom? The answer lies in Dynamic Range. A camera sensor has a limit to how much information it can capture in the highlights and shadows simultaneously. GND Filters: These are dark at the top and clear at the bottom. By physically darkening the bright sky before the light hits the sensor, the filter helps fit the scene’s dynamic range within the camera’s capabilities. While modern sensors have incredible dynamic range, a GND filter ensures that the sky isn’t “clipped” (blown out to pure white) in extreme conditions. However, for color correction (warming or cooling filters), digital processing has largely replaced physical filters. In the past, photographers used blue filters (80A) to shoot daylight film indoors under tungsten light. Today, this is handled by the White Balance setting in the camera or raw processing software. Technical Considerations: Thread Size and Quality When selecting a filter, understanding the physical specifications is as important as understanding the optical function. Filter Thread Size:Lenses come with different diameters. A filter must match the thread size of the lens (measured in millimeters, e.g., 67mm, 77mm, 82mm). This is usually marked on the front of the lens or the lens barrel with a “ø” symbol. Pro Tip: Instead of buying a CPL for every lens, photographers often buy one large filter (e.g., 82mm) and use “step-up rings” to adapt it to smaller lenses. This is a cost-effective strategy. Glass and Coating Quality:Placing a low-quality sheet of glass in front of a high-end lens is counterproductive. Cheap filters often use standard window glass with poor transmission rates, leading to: Color Casts: A purple or green tint on the image. Flare: Unwanted circles of light when shooting near the sun. Sharpness Loss: Softening of fine details.High-quality filters utilize Schott optical glass (or equivalent) and possess nano-coatings that repel water and oil, making them easier to clean—a vital feature for outdoor photography. Conclusion: The Indispensable Tools So, what do camera lens filters do? They act as the gatekeepers of light. They provide the first line of defense against physical damage, manage the intensity of light to control time and depth, and manipulate the physics of reflection to reveal colors and details that the naked eye might miss. While digital editing has replaced the need for color-correction filters, the “Big Three”—UV (protection), CPL (polarization), and ND (exposure control)—remain fundamental tools. They solve optical problems at the source. For any photographer aiming to master their craft, understanding and utilizing these optical modifiers is not optional; it is a prerequisite for controlling the photographic image completely. FAQ: Common Questions About Lens Filters Q: Do I really need a UV filter for a digital camera?A: Strictly speaking, for image quality, no. Digital sensors are not sensitive to UV light in the way film was. However, for protection, they are highly recommended. A high-quality clear protection filter creates a barrier against sand, water, and impact without affecting image quality. Q: Can I leave a Polarizing (CPL) filter on all the time?A: It is not recommended. CPL filters reduce the amount of light entering the lens by about 1.5 to 2 stops. This can force the camera to use a slower shutter speed or higher ISO, which might cause blur or noise in low-light situations. Additionally, the polarizing effect can look uneven on ultra-wide-angle lenses. Q: What is the difference between an ND filter and a GND filter?A: An ND (Neutral Density) filter darkens the entire image evenly. It is used to extend shutter speed or widen aperture. A GND (Graduated Neutral Density) filter is dark at the top and transitions to clear at the bottom. It is specifically used to darken a bright sky while keeping the foreground properly exposed. Q: Will stacking multiple filters affect image quality?A: Yes. “Stacking” filters (e.g., screwing an ND filter on top of a UV filter) introduces more layers of glass for light to pass through. This increases the likelihood of vignetting (dark corners), chromatic aberration, and lens flare. It is best practice to use only one filter at a time whenever possible.   [...]
Camera lenses are engineering marvels, often costing more than the camera body itself. They consist of numerous glass components, intricately designed mechanical structures, and advanced chemical coatings. This precision optical instrument is designed to minimize glare and maximize recovery. However, it always faces one enemy: the environment. Cosmetics, pollen, oily fingerprints, and moisture are unavoidable during any shooting process. Cleaning your lens with the right microfiber cloth is more than just a cleaning technique; it’s an essential maintenance measure that directly impacts image quality. Dirty lenses blur images, create flare around light sources, and negatively affect overall recovery. Wiping lens coatings is simple, but improper methods can cause permanent damage. Modern lens coatings, while robust, are not indestructible. This guide provides professional lens cleaning steps to ensure your lenses always remain clean and new, avoiding scratches or coating abrasion. Why Microfiber is the Industry Standard Before delving into this method, it’s essential to understand why microfiber cloth is the only material recommended for direct contact with optical glass. Microfiber is a synthetic material, typically a mixture of polyester fibers and polyester (polyamide). Unlike cotton fibers, which are naturally round fibers that are easily reassembled and pushed around, microfiber is made from split fibers. These fibers are tiny—typically only one-hundredth the diameter of a human hair. This split-fiber structure offers two distinct advantages in photographic equipment: Absorbent fibers: These fibers act like millions of tiny hooks or spoons, absorbing dirt and oil from surfaces and locking them into the fabric’s weave. Cotton, in contrast, easily smears oil onto surfaces. Absorbency: Microfiber can absorb up to seven times its own weight in liquid, allowing it to absorb oily stains (such as fingerprints) even with highly effective, harsh chemicals. However, not all microfibers are created equal. For camera lenses, optical microfiber must be used. This fiber undergoes a special tearing process, preventing lint and scratching the lens. Fabric cloths used for cleaning kitchen countertops or car dashboards are often too rough, attracting larger debris and potentially scratching the lens. The Golden Rule: Check Before You Clean A common mistake beginners make is immediately wiping any dirt or grime on the lens. This is the fastest way to damage a lens. If you wipe a dry, smudged lens with a microfiber cloth, you’re dragging these tiny particles across the lens surface. The cloth presses these particles into the coating, creating “cleaning marks” or warning scratches. Therefore, the cleaning process must always follow a specific order: remove loose debris first, then wipe. Essential Tools for Safe Cleaning A microfiber cloth is key to effectively cleaning lenses, but other tools are also needed. A complete cleaning kit should include: Optical-grade microfiber cloth: Best kept in a sealed plastic bag to prevent buildup. Air blower (rocket blower): A handheld rubber bulb that sprays a stream of air. Soft-bristled brush: Usually made of goat hair or synthetic fibers, commonly found on “lens pens”. Lens cleaning fluid: An alcohol-free solution specifically designed for multi-layered optical components. Detailed Step-by-Step Guide: How to Clean Your Lens with a Microfiber Cloth Following this procedure ensures the safest cleaning results. This method is adapted from the procedures used by service centers and professional rental companies. Step 1: Gravity-Assisted Inlet Before touching the lens with any object, blow it with air. Hold the camera with the lens facing down. Squeeze out the air forcefully, blowing air over the front of the lens. Invert the lens, using gravity to float heavier particles away from the glass surface instead of re-depositing them. This step can create a dangerous sandstorm that can cause scratches. Caution: Do not use compressed air canisters. The powerful propulsion in these canisters can sometimes spray out cold liquid, which may damage the lens coating or blow a particle into the lens cartridge. Step 2: Soft-Bristle Brush Technique If blowing air is insufficient to remove all loose dust (sometimes pollen can stick to the lens), use a soft-bristled lens brush. Gently sweep across the lens surface. Do not press down; let the tips of the bristles work. This is the second line of defense to ensure no hard particles remain on the lens. Step 3: Inspect the Surface Til the lens under strong light. If the surface is free of dust and grit, but you can still see stains, fingerprints, or dried watermarks, it’s time to wipe it with a microfiber cloth. Step 4: Dry Wiping For minor stains, wiping with a dry cloth is usually sufficient. Fold the Cloth: Never crumple the cloth into a ball. Fold it into a flat square or triangle. This provides cushioning for your fingers and ensures even pressure distribution. Wipe from Center to Edge: Place the cloth in the center of the lens. Using very gentle pressure, move the cloth in a circular, spiral motion towards the edge of the lens. Why Wipe in Circular Strokes? Circular wiping pushes residual dirt towards the lens edges, away from the optical center, which is crucial for sharpness. Furthermore, circular cleaning marks (if they appear) are less damaging to optical performance than straight scratches. Step 5: Wet Wipes (for Stubborn Stains) If wiping with a dry cloth fails to remove oil stains or salt spray, you’ll need to dampen the cloth with water. Important Warning: Never spray lens cleaning solution directly onto the lens. The liquid may run to the lens edge, seep under the retaining ring, and enter the lens assembly. This can cause mold growth, fogging, or electrical malfunctions in lenses with built-in motors. Correct Application Method: Place one or two drops of lens cleaning solution on a corner of a microfiber cloth, not on the lens itself. Use the damp side of the cloth to wipe the lens in the circular motion described above. Immediately switch to the dry side of the cloth and wipe the surface dry to prevent streaks. Common Contaminants and Their Removal Methods Different environments produce different types of contaminants. Please adjust your cleaning strategy accordingly. Seawater Splash: This is dangerous. Salt crystals are sharp and corrosive. If the lens is splashed with seawater, never wipe it after it dries. Salt crystals can scratch the coating. First, dissolve the salt crystals with a slightly damp cloth (soaked in lens cleaning solution), then gently wipe them away. Sand: If sand gets into the lens, primarily use a blower. Do not use a wiping cloth until you are absolutely certain that all sand particles have been removed. Oily fingerprints: These fingerprints are acidic and will corrode the coating over time. Wipe them clean with a microfiber cloth as soon as possible. What not to use To keep your lens clean, people often develop some bad habits. Here are some items that should absolutely not come into contact with your camera lens: Face tissues: These tissues are made from wood pulp, have a rough texture, and leave lint. T-shirts/clothing: Clothing can absorb sweat, body oils, and abrasive dust from the environment. Wiping the lens with clothing will only worsen the dirt, not remove it. Paper towels: These are highly abrasive and chemically treated. Household glass cleaners (such as Windex): These cleaners often contain ammonia, which can damage the delicate anti-reflective coating (fluorine or nano-coating) on ​​modern lenses. Always use a cleaner specifically designed for camera lenses. Microfiber cloth care While microfiber cloths are reusable, they do not have a self-cleaning function. Over time, the cloth absorbs grease wiped from the lens. A dirty cloth will then re-smear the grease onto the lens, causing it to become blurry and unpleasant. Furthermore, if the cloth falls on the floor, it will act like a magnet, attracting dust and sand. If a microfiber cloth has been on the floor, it should not be used to wipe the lens until it is clean. How to clean a microfiber cloth: To maintain the integrity of the fibers, follow these cleaning instructions: Hand wash or gentle machine wash: Use warm water. Use liquid detergent only: Use a small amount of general liquid detergent. Do not use fabric softener: This is crucial. Fabric softener works by forming a waxy residue on the fiber surface, making it feel soft. If the microfiber surface is covered with wax, it will lose its ability to absorb oil and leave oil stains on the lens. Do not use bleach: Bleach will damage synthetic fibers. Air dry: The high temperatures of a dryer may melt or damage the fibers. Hang the garment in a dust-free place to dry. After drying, store the cloth in a clean compartment inside a dedicated plastic bag or camera bag. Do not leave it lying around to avoid lint buildup. The Role of UV Filters Many photographers like to always wear a clear UV filter or protective filter on their lenses. The reason is simple: replacing a $50 scratch filter is much cheaper than replacing a $2,000 scratch lens element. Cleaning filters is exactly the same as cleaning lenses: the same method used to clean camera lenses applies to filters. However, because filters are flat (unlike curved lenses), they are generally easier to clean and less prone to dust accumulation in corners. When to Stop Cleaning Over-cleaning is also possible. Every time you touch the lens, there is a risk of minor scratches. It’s important to note that tiny bright spots on the front lens element are imperceptible in photographs. Optical principles dictate that the focal length range is much larger than the front lens element. The brightness on the front lens element usually only slightly reduces tactile sensitivity in strong backlighting. Therefore, it’s not necessary to pursue a perfectly flawless surface every day. Cleaning is only necessary when there are stains on the lens (stains have a greater impact on image quality) or when they are severely accumulated. Conclusion Mastering the technique of cleaning lenses with a microfiber cloth is key to patience and following the proper steps. This requires a shift in mindset from “wiping a window” to “maintaining a precision instrument.” By prioritizing the use of air to blow away loose particles on the lens, using a clean optical microfiber cloth, and avoiding the use of harsh chemicals, photographers can ensure that their lenses maintain optimal performance over the long term. A clean lens allows the camera sensor to capture the real world—clearly contrasting and undisturbed. Using a microfiber cloth carefully and cleaning it regularly is ultimately the most valuable accessory in your camera bag. Frequently Asked Questions (FAQ) Q: Can I breathe on the lens instead of using cleaning fluid? A: Breathing on the lens to create condensation is a common practice. Generally, occasional use is safe because the resulting moisture replenishes the lens. However, human breath may contain acidic substances and enzymes, and there is a risk of accidentally spraying saliva onto the lens. Using a dedicated lens cleaning fluid is always a safer and more hygienic option. Q: How often should I replace my microfiber cloth? A: A high-quality microfiber cloth can last for many years if washed frequently. However, if the cloth starts to feel rough, or continues to shed even after washing, the fibers may have broken. In this case, the cloth should only be used to clean the lens mount or tripod legs, and you should purchase a new cloth specifically for cleaning lenses. Q: Is it safe to clean the rear lens? A: Yes, but be very careful. The rear lens (the lens closest to the sensor) usually has a greater impact on image quality than the front lens. Stains here are easier to remove from photos. The method is the same as for the front lens—first blow air, then gently wipe—but be very careful not to touch the electronic contacts or push anything into the sensor body. Q: Why are there still oil stains on the rear lens after wiping? A: This is usually because the microfiber cloth is very dirty and covered in oil, or too much cleaning solution was used. Please wash the cleaning cloth or replace it with a new one. If using cleaning solution, remember: the less you use, the better. A small amount of cleaning solution is enough to remove the grease, then wipe it clean immediately with a dry cloth. [...]
Introduction: Unveiling the Magic Behind the Glass A camera lens is more than just a piece of glass; it’s a complex instrument of precision engineering designed to capture and shape light. For any photographer, moving beyond automatic settings requires a deeper understanding of this crucial tool. The global camera lenses market is a testament to their importance, a sector anticipated to grow from USD 6 billion in 2023 to USD 10 billion by 2032. This growth is part of a larger trend in the photography equipment market, which was valued at over USD 89 billion in 2023 and continues to expand. But what truly lies within that cylindrical housing? This breakdown will demystify every component, from the external controls you touch to the intricate optical heart within. Why Understanding Your Lens Matters Knowing the anatomy of your camera lens transforms you from a passive picture-taker into a conscious image-maker. Understanding how each part functions allows you to manipulate light, control sharpness, and creatively influence depth of field. It’s the difference between hoping for a good shot and knowing how to create one. This knowledge empowers you to make informed decisions when choosing your next lens and to fully exploit the creative potential of the gear you already own. A Glimpse Inside the Optical Marvel At its core, a lens is an optical device that gathers light from a scene and focuses it onto your camera’s digital sensor. It achieves this through a series of precisely shaped and arranged glass elements. Every ring you turn, every switch you flip, and every internal motor that whirs to life is part of a sophisticated system dedicated to one goal: rendering a sharp, clear, and compelling image. The External Anatomy: What You See and Interact With An overview of the key external components of a typical modern camera lens. The exterior of a camera lens provides the primary interface for the photographer. These are the physical components you handle to frame your shot, adjust focus, and control the image’s final look. The Lens Barrel: The Protective Outer Shell The lens barrel is the main body and outer casing of the lens. Typically constructed from high-quality plastic or metal, its primary function is to house and protect the delicate internal lens elements and mechanical systems from dust, moisture, and impact. It provides the structural foundation upon which all other external components are mounted. The Lens Mount: Connecting to Your Camera The lens mount is the critical interface that physically and electronically connects the lens to the camera body. Usually made of durable metal like stainless steel or brass, it features a bayonet system for a secure, twist-on fit. This connection is not just mechanical; it includes electronic contacts that allow the lens and camera to communicate, transmitting data for autofocus, aperture control, and image stabilization. The interchangeable lens segment, which relies on these mounts, dominates the market with a revenue of 3.7 billion in 2023, underscoring the importance of this connection. Focusing Rings: Achieving Critical Sharpness The focusing ring is a rotatable section on the lens barrel that allows for manual adjustment of the lens’s focus. Turning this ring moves specific lens elements inside, changing the distance at which subjects appear sharp. Even on autofocus lenses, this ring is crucial for fine-tuning or for situations where autofocus struggles, giving the photographer ultimate control over the point of critical sharpness. Zoom Rings: Changing Your Perspective (for zoom lenses) Found exclusively on zoom lenses, the zoom ring allows the photographer to change the focal length without changing their physical position. Rotating this ring shifts internal lens groups, altering the angle of view and magnification. This lets you go from a wide-angle shot to a telephoto close-up in seconds, offering immense compositional flexibility. Prime lenses, which have a fixed focal length, do not have a zoom ring. Aperture Rings: Direct Control Over Light and Depth (where present) While many modern lenses control aperture electronically through the camera body, some, particularly vintage or cinema lenses, feature a dedicated aperture ring. This ring allows for direct, tactile control over the aperture diaphragm inside the lens. Marked with f-stop numbers (e.g., f/1.8, f/4, f/11), it provides a hands-on method for adjusting the amount of light entering the lens and controlling the depth of field. Filter Threads: Expanding Creative Possibilities Located on the very front rim of the lens, filter threads are a set of fine grooves designed to screw on accessories like filters. These filters can protect the front element (UV filters), reduce reflections (polarizers), or control exposure for long-exposure photography (neutral density filters), significantly expanding the creative capabilities of the lens. Lens Hood Mount: Reducing Flare and Protecting the Front Element Just outside the filter threads is the lens hood mount, typically a bayonet-style fitting. A lens hood attaches here to block stray light from hitting the front lens element, which prevents lens flare and ghosting while improving contrast. It also offers a valuable layer of physical protection against bumps and scrapes. Switches and Displays: On-Lens Controls Modern camera lenses often feature a variety of switches for quick control over specific functions. Common switches include AF/MF (Autofocus/Manual Focus), Image Stabilization (On/Off), and sometimes a focus limiter. Some high-end lenses may also include a small digital display showing focus distance or depth of field information. The Optical Heart: Elements, Groups, and the Path of Light Beneath the barrel lies the true magic of the lens: a carefully engineered collection of glass that manipulates light to form an image. Lens Elements: The Fundamental Building Blocks Lens elements are the individual, precisely shaped pieces of optical glass or plastic inside the lens. Each element is designed to bend (refract) light in a specific way. A simple lens might have only a few elements, while complex zoom lenses can contain 20 or more. The quality, shape, and material of these elements are paramount to the final image quality. Lens Groups: Precision Engineering for Image Correction To achieve a sharp image and correct for optical imperfections, individual lens elements are often cemented together into a single unit called a lens group. The arrangement and movement of these groups are what enable focusing and, in zoom lenses, changing the focal length. The design specifies how many elements and groups a lens has (e.g., “15 elements in 11 groups”). Specialized Lens Elements: Battling Optical Imperfections To produce the sharpest possible images, lens designers use specialized elements. Aspherical elements have complex, non-spherical surfaces that correct for various aberrations. Extra-low Dispersion (ED), Super ED, or Fluorite elements are made from special glass that reduces chromatic aberration, preventing color fringing around high-contrast edges. Understanding Optical Aberrations: The Challenges Lenses Overcome No lens is perfect. Optical aberrations are imperfections in the way a lens focuses light. Common types include spherical aberration (softness), chromatic aberration (color fringing), and distortion (where straight lines appear curved). The entire optical design, including the number of elements and the use of specialized glass, is a complex balancing act to minimize these aberrations. Lens Coatings: The Invisible Enhancers of Image Quality Each lens element is treated with microscopic, multi-layered coatings. These invisible layers serve a critical purpose: they reduce reflections and glare that occur as light passes through the glass. This significantly improves light transmission, boosts contrast, and ensures colors are rendered accurately, preventing the washed-out look caused by internal reflections. The Mechanical & Electronic Systems: Precision in Motion Beyond the static glass, modern lenses contain sophisticated systems that move with speed and precision to achieve the photographer’s vision. The Aperture Mechanism: Controlling Light, Depth, and Bokeh The aperture is a diaphragm made of overlapping metal blades that can open and close to form a circular opening of varying sizes. This mechanism controls how much light passes through the lens to the sensor. A wider aperture (smaller f-number) lets in more light and creates a shallow depth of field with creamy backgrounds, known as Bokeh. A smaller aperture (larger f-number) lets in less light and keeps more of the scene in focus. Focusing Mechanisms: Achieving Pinpoint Sharpness The focusing system moves lens groups forwards or backward to achieve sharp focus at different distances. In an autofocus (AF) system, a tiny motor—such as an Ultrasonic Motor (USM) or Stepping Motor (STM)—drives this movement based on commands from the camera. The speed and silence of this motor are key performance indicators for a modern camera lens. Image Stabilization Systems: Counteracting Camera Shake Many modern lenses include an image stabilization (IS) system, also known as Vibration Reduction (VR) or Optical SteadyShot (OSS). This technology uses gyroscopic sensors to detect camera movement and then shifts a specific lens group to counteract the shake. This allows a photographer to shoot at slower shutter speeds handheld without introducing motion blur. Electronics: The Brains of the Modern Lens A dedicated circuit board and microprocessor act as the brain of the lens. They process commands from the camera, control the aperture diaphragm, drive the autofocus motor, and manage the image stabilization system. This electronic communication is what makes modern, feature-rich camera lenses possible. Beyond the Essentials: Specialized Lens Types and Concepts The combination of all these parts allows for a wide variety of lens designs, each suited for different photographic tasks. Prime vs. Zoom Lens Construction Prime lenses have a fixed focal length, meaning they cannot zoom. Their construction is often simpler with fewer moving parts, which can lead to sharper images and wider maximum apertures. Zoom lenses contain additional, complex lens groups that move to provide a range of focal lengths, offering versatility at the cost of some size, weight, and occasionally, optical quality. Focal Length and Image Circle Focal length, determined by the optical design, dictates the lens’s angle of view and magnification. The image circle is the cone of light the lens projects onto the sensor. A lens must produce an image circle large enough to cover the camera’s sensor (e.g., full-frame or APS-C). For instance, in 2024, lens sales saw nearly 4.5 million full-frame lenses sold, each designed to project a large enough image circle for that sensor format. Specialized Lens Types and Their Unique Anatomy Different lens types have unique components. Macro lenses have focusing mechanisms that allow for extreme close-ups. Fisheye lenses use a highly convex front element to achieve an ultra-wide, distorted perspective. Tilt-shift lenses have complex mechanical assemblies that allow the lens to be physically tilted or shifted relative to the sensor to control perspective and focus plane. The ongoing innovation is evident as mirrorless cameras now outsell DSLRs by a factor of 5, driving the development of new and specialized lens designs for these systems. The Symbiotic Relationship: How Lens Parts Work Together A camera lens is a symphony of components working in perfect harmony. No single part operates in isolation; they are all interconnected, contributing to the final image. From Light Capture to Image Projection When you press the shutter button, a chain reaction occurs. Light enters through the front element, its path refined by coatings and specialized glass. The aperture diaphragm sets the brightness and depth. The focusing motor rapidly adjusts a lens group for perfect sharpness. The image stabilization system compensates for your movement. Finally, this precisely controlled beam of light is projected onto the camera sensor, creating your photograph. Each component, from the simplest ring to the most complex electronic system, plays an indispensable role in this intricate dance of light. Understanding this process is the key to mastering the art and science of photography. Sure, here’s a draft for your marketing advertisement: If you’re in the market for high-quality lenses, look no further. At Leedsen, we pride ourselves on precision, innovation, and unmatched customer service. Whether you’re seeking specialized lenses or collaborating on custom designs, our team is ready to assist with your needs. Choose Leedsen, where excellence in lens manufacturing meets your vision. Contact us today to learn more about our products and services! Frequently Asked Questions About Camera Lenses 1. What are the main parts of a camera lens? A camera lens consists of several key components: the front element, aperture diaphragm, focusing elements, image stabilization system, lens mount, focusing rings, and electronic contacts. 2. What does the front element of a camera lens do? The front element is the lens’s first point of contact with light. It plays a crucial role in capturing and directing the light through the lens system, responsible for minimizing distortions and ensuring optimal image quality. 3. How does the aperture diaphragm affect a photo? The aperture diaphragm controls the amount of light entering the lens and hitting the camera sensor. It affects exposure, depth of field, and the sharpness of an image. A wider aperture (small f-number) allows more light in and creates a shallow depth of field, while a narrow aperture (large f-number) results in a deeper focus. 4. What is the purpose of the focusing elements in a camera lens? Focusing elements adjust the position of lens groups to ensure the subject is sharp and in focus. Whether through manual rings or autofocus motors, these elements are critical for achieving the desired sharpness. 5. Why is image stabilization important in a lens? Image stabilization reduces the blur caused by camera movement during exposure. It is particularly beneficial in low-light conditions or when shooting hand-held at slower shutter speeds. 6. How do electronic contacts in a camera lens work? Electronic contacts facilitate communication between the lens and the camera body. They transmit data such as aperture settings, focus information, and image stabilization status, allowing the camera to effectively control the lens. 7. Can I use the same lens on different camera brands? Not all lenses are interchangeable across different camera brands due to variations in lens mounts and electronic systems. Using lens adapters can sometimes bridge this compatibility gap, but with potential limitations in functionality. 8. What is the significance of lens coatings? Lens coatings reduce reflections, glare, and lens flare while enhancing contrast and color fidelity. These coatings are applied to lens elements to improve image quality, especially in challenging lighting situations. 9. Do all lenses have image stabilization? Not all lenses come equipped with image stabilization. It’s a feature more commonly found in telephoto or zoom lenses, but many prime lenses lack this capability, relying on the camera body for stabilization. 10. How often should I clean my camera lens, and what’s the best way to do it? Cleaning your camera lens depends on usage frequency and environmental conditions. Generally, clean it whenever you notice dirt or smudges affecting your photos. Use a lens blower, a soft brush, and specially designed lens cleaning cloth and solution to avoid scratching the lens elements. Understanding these components and their functions can significantly enhance your photography skills, allowing you to make informed choices when selecting and using camera lenses. [...]

Leave a message

If you have any questions, please leave a message in the comment box and we will contact you as soon as possible (fields marked with an asterisk are required).